Setting up an aquarium: Ten steps guide
13.02.2023 - Reading time: 7 minutes

How should I set up my aquarium? This is question that is familiar to every new aquarium owner, there’s just so many creative possibilities. Stone decoration, corals and plants can turn your aquarium into a unique ray of light with an enormous relaxation potential. When decorating your aquarium, you can unleash your fantasy, creating a mini paradise, a source of energy and inner peace for your soul.
- Step 1: Finding the right location
- Step 2: Buying an aquarium
- Step 3: Finding the right cabinet
- Step 4: Choosing the right material for the aquarium bed
- Step 5: Layering the aquarium bed
- Step 6: The right lighting
- Step 7: Installing the technical equipment
- Step 8: Filling and planting the aquarium
- Step 9: Waiting until the right time to add the fish
- Step 10: Adding your fish
Step 1: Finding the right location
An aquarium needs light. But too much light promotes the growth of algae. The aquarium should be so positioned that it does not receive more than two to three hours of sunlight daily. With aquariums holding more than 300 litres of water, it is also recommended to check if the floor is stable enough to hold the weight. When full, the aquarium can weigh 400 kilogrammes. That’s quite a weight! If there is any doubt, it makes sense to consult a structural engineer. Because of the weight, it is also a good idea to only use cabinets or stands that have been specially designed for aquariums.
Step 2: Buying an aquarium
The bigger the aquarium, the more stable the water parameters. This means less work. For beginners, an aquarium with a side length of at least 80 centimetres (holding approx. 100 litres) is the best choice. There are also starter models that can hold around 54 litres.
Step 3: Finding the right cabinet
A solid foundation is imperative for your aquarium. Whether an all-in-one system or a simple cabinet: It must be stable!
A railing offers the advantage of additional stability, preventing the aquarium from sliding to one side or the other. With wooden cabinets it is extremely important that they have a sealed surface. The wood would otherwise swell due to repeated contact with water. You should also place a rubber or polystyrene mat between the aquarium and the cabinet surface. This also aids stability by evening out any small bumps. Water that has slopped over the side of the aquarium and not been mopped up can cause even high-quality surfaces to become porous over time. Please also take care that no puddles form under the aquarium that could, in time develop into a biotope of their own.
Most cabinets offer plenty of storage room for aquarium accessories (e.g. fish food, nets etc.) Parts of the technical equipment, annoying cables and often even an external filter can also be hidden away in the cabinet.
Step 4: Choosing the right material for the aquarium bed
The choice of aquarium bed depends on the aquarium’s future inhabitants.
• Gravel makes a great all-round aquarium bed for both plants and fish. You should go for rounded aquarium gravel to ensure that the fish do not injure themselves on sharp edges. The size of the gravel is significant – from coarse gravel to the finest grained gravel for shrimps, there are a myriad of possibilities to tailor your aquarium to the needs of its inhabitants. Many species like to root around in or dig themselves into the aquarium bed – you should choose a significantly finer grained gravel or sand here.
• Sand is suitable for fish that like to root around, such as cory catfish or fish that like to dig themselves in like loaches or banjo catfish. Pure quartz sand is best here as it doesn’t foul quickly and doesn’t impact the water quality. Some plants however, have trouble finding a grip in this kind of loose material. In order to keep both plants and fish that need sand happy, you can of course use different types of aquarium bed. A barrier of stones or roots helps to separate the two materials and prevent digging fish from mixing them together.
In both cases, the aquarium bed material should be rinsed so long beforehand with clear water until the water is no longer cloudy.
Step 5: Layering the aquarium bed
At the bottom of the aquarium you should first lay an approximately two-centimetre-thick layer of soil substrate. The actual bed is then placed on top:
gravel, quartz sand or one of the many other possible materials. The soil substrate should not come into direct contact with water, only with the plant roots. The aquarium bed material should be laid so that it rises diagonally towards the back of the aquarium. This provides a better aesthetic when viewing the finished aquarium later on. Depending on the size of the aquarium, the bed should be laid five to ten centimetres high at the back wall. Here you can then add roots and stones to provide the fish with their necessary hideouts.
Step 6: The right lighting

Just like us, aquarium inhabitants need light to live. Light is also especially important for plant growth underwater. Plants produce vital oxygen for the other aquarium inhabitants. Fish also need light for their day-night rhythm, for spatial orientation and for their general wellbeing.
When choosing your light source, you should take the following into account::
• Which lighting is best for your aquarium depends, among other things, on the depth of the water. A modern, and the best solution is LED lighting. This lighting is energy efficient, extremely bright and doesn’t give off heat so the water doesn’t get too warm in summer. LEDs are available in a multitude of variations and are generally dimmable using a control unit. Modern aquarium sets are pre-equipped with LEDs. Alternatives are fluorescent tubes or halogen lamps.
• A reflector distributes the beams of light evenly throughout the whole aquarium and increases the yield of light by up to one hundred percent. A reflector is integrated into most LEDs.
• A timer switch controls the lighting. Twelve hours light, twelve hours darkness – that is the rule of thumb here. A lighting controller that slowly dims the light on and off, mimicking the natural phases of sunrise and sunset is particularly good for aquarium fish and plants. You can also achieve a similar effect by turning different lights on and off at different times.
Should you have problems with excessive algae growth, it can be helpful to integrate a midday lighting break of two to three hours into your lighting plan.
Step 7: Installing the technical equipment
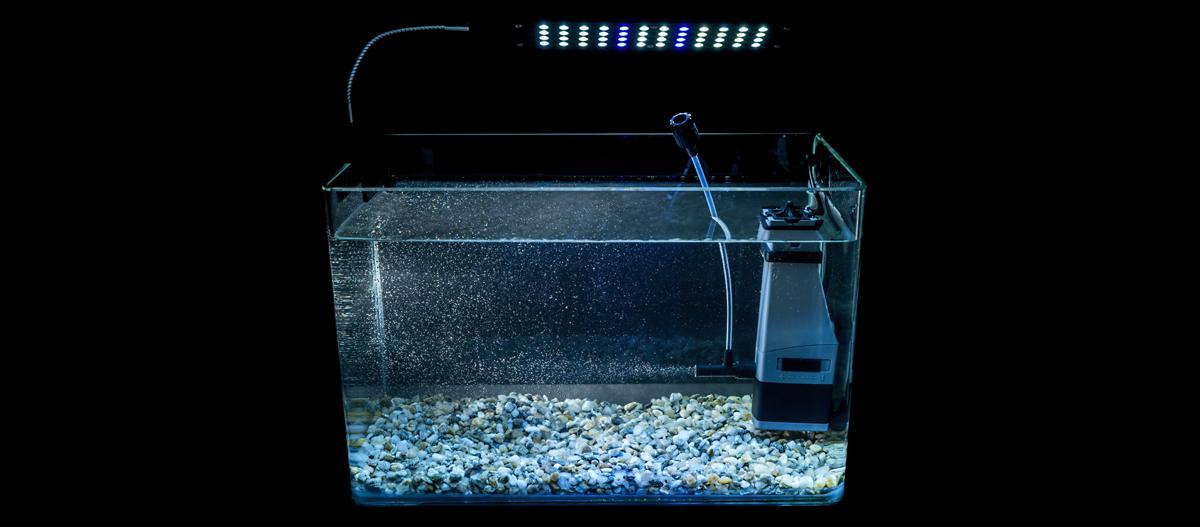
A filter, heater, thermometer and lighting are part of your basic aquarium equipment. A good internal filter can cope with aquariums holding approximately up to 100 litres, above this capacity an external filter is better. This has the advantage of being able to hold more and varying filter materials to provide more room for filter bacteria. Using both systems is often a good idea.
Step 8: Filling and planting the aquarium
To prevent the material on the aquarium bed from getting stirred up while filling with water, simply lay a plate on it and direct the water onto that. A water temperature of 24 to 26 °C is suitable for most aquarium fish. When the aquarium is approximately ten centimetres full, you can set the plants in the bedding material.
Step 9: Waiting until the right time to add the fish
Without the use of bacterial additives from specialist shops (starter bacteria) it will take around three to four weeks for your aquarium to cycle. Only then can you add your fish. Around four weeks after using starter bacteria from specialist shops and testing the water parameters, and when, in particular, thanks to the bacteria that has formed, the initially high nitrate value has been reduced to zero, the first aquarium inhabitants can move in.

Step 10: Adding your fish
After the waiting time has elapsed, you can release your first fish into the aquarium. We would like to wish you lots of enjoyment with your fascinating underwater world.